Laying drainage on your own
In the long run, moisture will affect every building – this is especially true for houses on hillsides. In such cases laying drainage may be the best solution, keeping your house and property dry. At the same time, the homeowner prevents damage resulting from damp walls, or even mildew. Slopes, however, are not the only case where it makes sense to lay drainage. Drainage can also be useful in soils with a high clay or loam content, as it allows moisture to flow off better and more quickly, for example after rainfall. Especially with older buildings, there is a lot of catching up to do: Drainage was often not included in earlier constructions. Today, with a little skill and craftsmanship experience, you can do this on your own.
Proper drainage preparation
In order to lay drainage, one needs suitable dimpled membrane, manual skill and some tools. In some cases, a mini-excavator can be helpful to first uncover the masonry. To excavate the wall, carefully work your way up to the cellar floor. But be careful: Excessive exposure can jeopardize the structure’s stability, so proceed cautiously, seeking professional assistance if necessary. In the subsequent work steps, do-it-yourselfers can proceed alone again: First, clean the outside wall, let it dry and repair or plaster over any damage and holes. The wall is then painted with permanently elastic bitumen.
Installing drainage
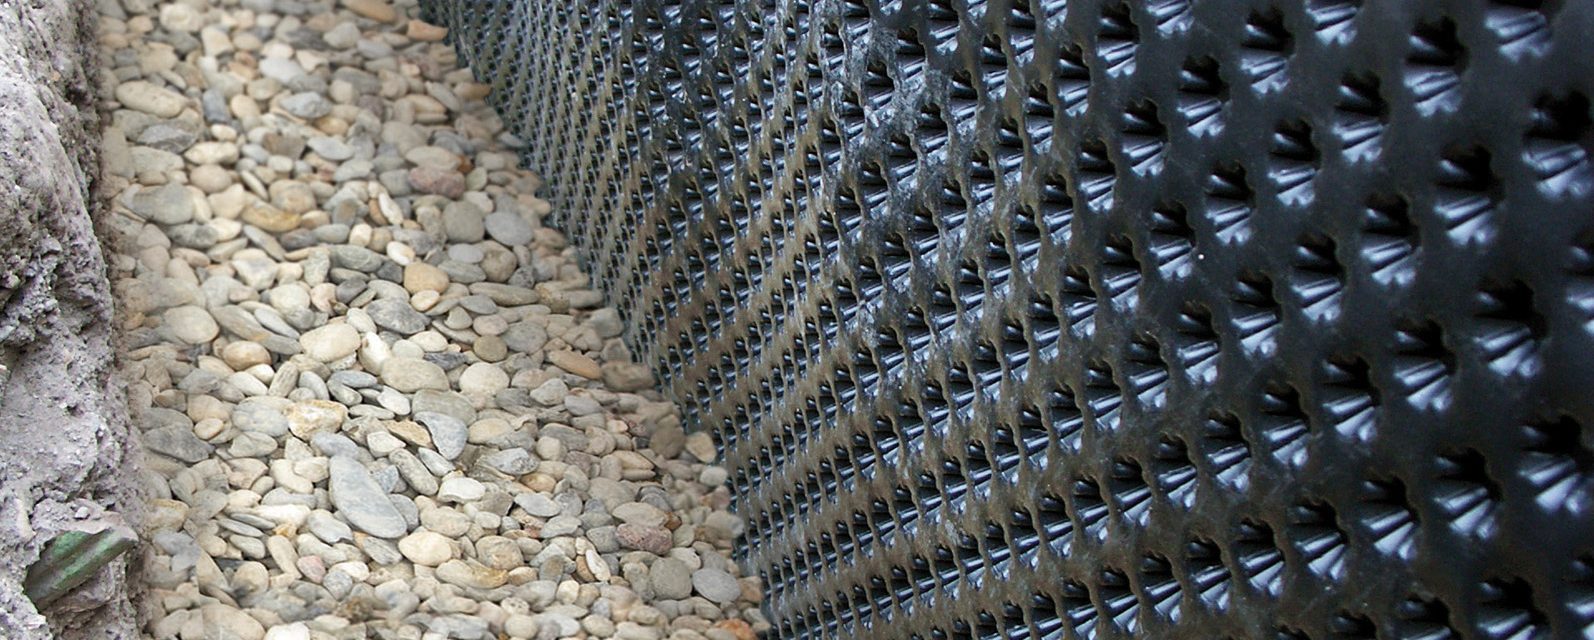
The actual drainage is laid once this preliminary work has been completed, using special dimpled membranes with filter fabric, for example. The top edge of the foundation wall should be used as the upper fixing point, about 10 cm above the sealing coat. The lower fixing point is set directly above the drainage pipe. One especially practical and time-saving tip is to lay the dimpled membrane out directly from the roll – using this method, installation occurs in the twinkling of an eye. Remember: The dimples of the dimpled membranes should always face towards the wall and the filter fabric towards the ground, allowing moisture to flow off effectively and unhindered.
Tightly conjoining rows
In order for the drainage to reliably fulfil its purpose, it should be well sealed. Proper sealing is aided by the fact that the dimpled membranes are laid with an overlap of around 10 centimetres. Special adhesive tape can further ensure tight connections. Use a blade to fit passages for pipes and cut-outs for windows. Depending on the type of drainage material being used, the next step is to fix it along the nail edge or with special assembly dowels. A cover profile makes for a neat finish, and just like that you have finished installing the drainage yourself. Finally, of course, the opened trench must still closed. By the next heavy rain, the house owner will discover that installing drainage was worthwhile – both for himself and the value of his home.

